Understanding HT12E: A Comprehensive to the RF Encoder IC
 Prof. David Reynolds
Published:March 25, 2024
Encoding is the process of converting data into a format suitable for transmission over a communication channel. In remote control systems, encoding plays a vital role in ensuring that the receiving device correctly interprets the transmitted data. The HT12E is a well-known encoder IC (integrated circuit) utilized in remote control applications. It is specifically designed to encode data for transmission in wireless communication, making it an essential component in remote control applications. In this article, we'll delve into HT12E, exploring its pin diagram, features, working, uses, and more details. Everything you need to know about this encoder IC.

What is HT12E?
The HT12E is an encoder IC in the 212 series, commonly used with 212 series decoders for remote control system applications. It is primarily employed in interfacing RF and infrared circuits. It's crucial to match the encoder and decoder with the same number of addresses and data formats. The HT12E, a 2^12 encoder, can encode 12 bits of data simultaneously, converting input data into a serial output. Widely used in remote control systems, security systems, and other applications requiring wireless communication, the HT12E IC is designed to complement the HT12D decoder IC, forming a simple and reliable wireless communication system. Easy to use and requiring minimal external components, the HT12E encoder IC is favored by hobbyists and professionals alike.
HT12E Pin Diagram

Pin Configuration
The HT12E is a 12-bit encoder IC capable of converting parallel data into serial data. It features 18 pins, with 8 pins for data input, 4 for address input, and 6 for control signals. The pin configuration of the HT12E is as follows:
| Pin No. | Pin Name | Description |
| 1 to 8 | A0,A1,A2,A3,A4,A5,A6 & A7 | These are the 8-bit address bits, which is used to protect your data. We should set the bits in same pattern on Encoder and Decoder IC to pair them. |
| 9 | Ground/Vss | Connected to the Ground of circuit |
| 10 to 13 | AD0, AD1, AD2 & AD3 | These four pins are used to send data, the data encoded here will be decoded on HT12D IC sharing the same address bits |
| 14 | Transmission Enable(TE) | This pin has to be connected to Ground (0V) to enable the Transmission |
| 15 and 16 | Oscillator pins 1 & 2 | The IC has a built in oscillator. This oscillator can be used by connecting these two pins through a 1M Resistor |
| 17 | Output | The Encoded 12 bit output data can be obtained from this pin |
| 16 | Vcc/Vdd | This pin powers the IC, typically +5V is used. Can range from 2.4V to 12V |
- VDD and VSS: These are the positive and negative power supply pins, respectively.
- OSC1 and OSC2: These pins are used for connecting an external oscillator or crystal oscillator to the IC.
- TE: The Transmission Enable pin is used to enable the transmission of data. A low signal on this pin activates the transmission.
- A0 – A7: These pins are the address input pins used for secure data transmission. They can be connected to VSS for a low signal or left open for a high state.
- AD0 – AD3: These pins are used for feeding data into the IC. They may be connected to VSS for sending a low signal since they are active low pins.
- DOUT: This pin is used to obtain the output of the encoder, which can be connected to the RF transmitter.
What is the Function of HT12E?
The HT12E encoder IC is essential for converting parallel data into serial data. It achieves this by converting 12 bits of parallel data into a 4-bit serial data stream while also appending a sync bit and a header bit to the serial stream. The sync bit ensures synchronization between the transmitter and receiver, while the header bit marks the beginning of a new transmission.
This IC is commonly utilized in remote control systems due to its capability to transmit data over significant distances. It accomplishes this through amplitude-shift keying (ASK) modulation, which enables the transmission of the serial data stream. Operating at frequencies up to 12 MHz, the HT12E encoder IC is suitable for various remote control applications.
To summarize, the HT12E encoder IC converts parallel data into serial form, making it valuable for remote control systems with its long-distance transmission capabilities. It utilizes ASK modulation and can operate at frequencies up to 12 MHz.
How does HT12E Encoder IC Work?

The HT12E is an RF encoder IC primarily designed to convert input data signals into corresponding RF signals. Its operation can be outlined as follows:
Data Input: The HT12E features eight data pins (D0 to D7) capable of accepting 8 bits of binary data from external sources such as switches, microcontrollers, or other digital devices.
Address Configuration: Additionally, the HT12E includes four address pins (A0 to A3) used to configure specific address codes. These codes differentiate between different remote controllers or receiving devices by assigning a unique address to each, which is achieved by setting these pins accordingly.
Encoding: Inside the HT12E, an encoder combines the input data and address information into a 12-bit encoding signal.
RF Transmission: After encoding, the HT12E converts the encoding signal into an RF signal and transmits it through its output pin (TE). This RF signal can then be captured and decoded by receiving devices.
Features and Specifications
- 12-bit Encoder IC designed for use with HT12D
- Encoded data consists of 4 Data bits and 8 Address bits (8+4=12 bits)
- Commonly utilized for RF and IR wireless transmission
- Wide supply voltage range from 2.4V to 12V, typically 5V is used
- Low standby current of 0.1uA at Vcc=5V
- Available in 16-pin DIP and 20-pin SOP packages
- The encoder can encode 4 words simultaneously.
- CMOS technology ensures low noise immunity for the encoder.
- HT12E's built-in oscillator only requires a 5% resistor to operate.
- RF and IR modules can be directly used with the encoders.
- The encoder can convert 4-bit data to serial data.
- Only 256 different address combinations are usable with HT12E.
HT12E Equivalent/Alternative
The HT12E encoder IC has several equivalents that offer similar functionality and performance characteristics. Some of these equivalents include:
PT2262: The PT2262 is a remote-control encoder IC that can be used as an alternative to the HT12E. It is commonly used in remote control applications and offers similar encoding capabilities.
74C922: The 74C922 is a keyboard encoder IC that can be used as an alternative to the HT12E. It is commonly used in keyboard applications and offers similar encoding functionality.
These equivalents provide flexibility in circuit design and can be used interchangeably with the HT12E in many applications.
Where to use HT12E Encoder IC
The HT12E IC is designed to be used exclusively with its counterpart, the HT12D. Together, these ICs form an Encoder and Decoder pair. They are 12-bit Encoders/Decoders capable of transmitting 12 bits of data between them. However, your encoder IC must communicate only with its corresponding decoder IC. To achieve this, both ICs share a common 8-bit Address, leaving the remaining 4 bits for data transmission. With 4 bits of data, you can create 16 different combinations (2^4 = 16). These ICs are commonly employed in RF or IR pairs. If your project involves transmitting 4-bit data from one point to another, either through wired or wireless means, then this IC pair is ideal for your application.
How to use HT12E Encoder IC
The HT12E's main function is to encode a 12-bit signal and transmit it through the output pin. With its built-in oscillator, this IC is easy to operate. It has a wide operating voltage range of 2.4V to 12V, but typically, the Vcc pin (pin 18) is powered by +5V, and the ground pin (pin 9) is connected to the ground. To activate transmission, ground the Transmission Enable pin (pin 14).
For decoding, the IC requires an oscillator, which is conveniently built-in. Connecting pins OSC1 and OSC2 (pins 15 & 16) through a 1M resistor will activate it. The 4-bit data to be transmitted should be applied to pins AD0 to AD1, and an 8-bit address must be set using pins A0 to A7. The Decoder must have the same address set to establish communication between them. Below is a basic connection diagram for the HT12E IC:

In the circuit above, I have set the 8-bit address data to 0b00000000 by connecting all address pins to ground. For added security, you can connect any of the 8 pins to 5V to set it high. The entire IC is powered by a +5V supply, which can be obtained from a voltage regulator such as the 7805.
The pins AD3, AD2, AD1, and AD0 are connected to a Digital IC that provides the 4-bit data. Alternatively, they can be connected to switches for manual data transmission. In this configuration, all four data bits are set to zero (low). When this is decoded, the same bits will be reflected on the output side of the HT12D decoder IC.
The encoded 12-bit data can be obtained from the Dout pin (pin 17). This data should be sent to the HT12D for decoding, either directly through a wire or using a wireless medium like RF or IR. You can learn how to set up the HT12D for decoding from here.
HT12E Application
- Remote Control Systems: Widely used to encode data for transmission in remote control systems.
- IoT Devices: With the rise of IoT, HT12E is used in smart systems to enable wireless communication, reducing the load on the internet.
- Alarm Systems: Smoke and builder alarm systems encode their messages using HT12E.
- Wireless Communication: Essential for wireless communication using infrared and radiofrequency technologies.
- Electronic Systems: Found in electronic and smart systems for remote switching.
- Safety Systems: Crucial for safety systems like burglar and fire alarm systems, as well as smoke alarms.
- Electronic Toys: Core component in electronic toys for remote-controlling cars, aircraft, and other toys.
- Automation Control is used in home and industrial automation to control and monitor devices like lighting, temperature, and motorized curtains.
- Wireless Sensor Networks: These are combined with sensors for data collection and monitoring in systems like weather stations and environmental monitors.
Circuit Example
Here is a basic circuit example using the HT12E to demonstrate its integration into an application:

This circuit example includes the following components:
- HT12E Encoder IC: The HT12E is responsible for encoding data and transmitting RF signals.
- Data Switches: These switches act as the data input pins (D0 to D7) and can be adjusted to input the data for encoding.
- Address Switches: These switches act as the address input pins (A0 to A3) and can be set to configure the address code.
- External Crystal Oscillator: The HT12E requires an external crystal oscillator for precise clock synchronization.
- Battery Power Supply: The HT12E requires power, and a battery is used in this example as the power source.
Please note that the actual circuit design may vary depending on the specific requirements of your application. This example serves as a basic guide to help you design an appropriate circuit.
Interfacing HT12E with Microcontroller
The HT12E IC can be easily connected to a microcontroller for wireless data transmission. To interface the HT12E with a microcontroller, follow these steps:
- Connect the data pins (D0-D7) of the HT12E to the output pins of the microcontroller.
- Connect the address pins (A0-A3) of the HT12E to the address pins of the microcontroller.
- Connect the TE pin of the HT12E to a digital pin of the microcontroller.
- Connect the GND and VDD pins of the HT12E to the ground and power supply of the microcontroller, respectively.
- Connect the OSC1 and OSC2 pins of the HT12E to an external oscillator or a crystal oscillator.
- Connect the DIN pin of the HT12E to the data pin of the RF transmitter module.
- Connect the VT pin of the HT12E to an LED or a buzzer to indicate a successful transmission.
Programming HT12E
Programming the HT12E is straightforward. The data and address pins of the HT12E can be programmed using a microcontroller to transmit data wirelessly. Follow these steps to program the HT12E:
- Set the data pins (D0-D7) to the desired data values.
- Set the address pins (A0-A3) to the desired address values.
- Set the TE pin to high to enable transmission.
- Wait for the oscillator to stabilize.
- Send a pulse to the DIN pin to transmit the data.
- Wait for the transmission to complete.
- Check the VT pin to ensure a successful transmission.
Advantages & Disadvantages
Advantages of HT12E
Low Power Consumption
The HT12E offers low power consumption as a key advantage. It operates within a supply voltage range of 2.4V to 12V, making it suitable for battery-operated devices. Its minimal power requirements make it ideal for applications where power efficiency is crucial.
Ease of Use
HT12E is known for its simplicity, making it suitable for both beginners and experienced users. It requires minimal external components, and its pin configuration is easy to understand. Additionally, the built-in oscillator eliminates the need for an external clock source, simplifying the design process and reducing system complexity.
Cost-Effectiveness
HT12E is a cost-effective solution for data encoding. Its affordability makes it a great choice for projects with budget constraints. The minimal external components required further contribute to cost savings. Additionally, its low power consumption reduces the need for expensive power supplies, making it a cost-effective option overall.
In summary, HT12E is a suitable choice for applications requiring low power consumption, ease of use, and cost-effectiveness. Its simple design, built-in oscillator, and low power requirements make it ideal for various applications.
Disadvantages of HT12E
Limited Range
One of the HT12E encoder's main drawbacks is its limited operating range. The device typically has a maximum range of around 50 meters, which may pose challenges in larger-scale applications. Factors such as interference from other wireless devices, physical obstructions, and environmental conditions like weather can contribute to this limited range.
Low Data Rate
Another disadvantage of the HT12E encoder is its relatively low data rate. The device can transmit data at a maximum rate of only 4 kbps, which may need to be improved for applications requiring high-speed data transmission. This limitation is influenced by factors such as the device's bandwidth constraints and the encoding scheme it employs.
In summary, while the HT12E encoder offers several advantages, including ease of use and low power consumption, it also has notable drawbacks. Its limited operating range and low data rate may restrict its suitability for certain applications. However, these limitations can be managed by selecting appropriate applications and optimizing the device's performance.
HT12E Datasheet
Download HT12E Datasheet PDF.
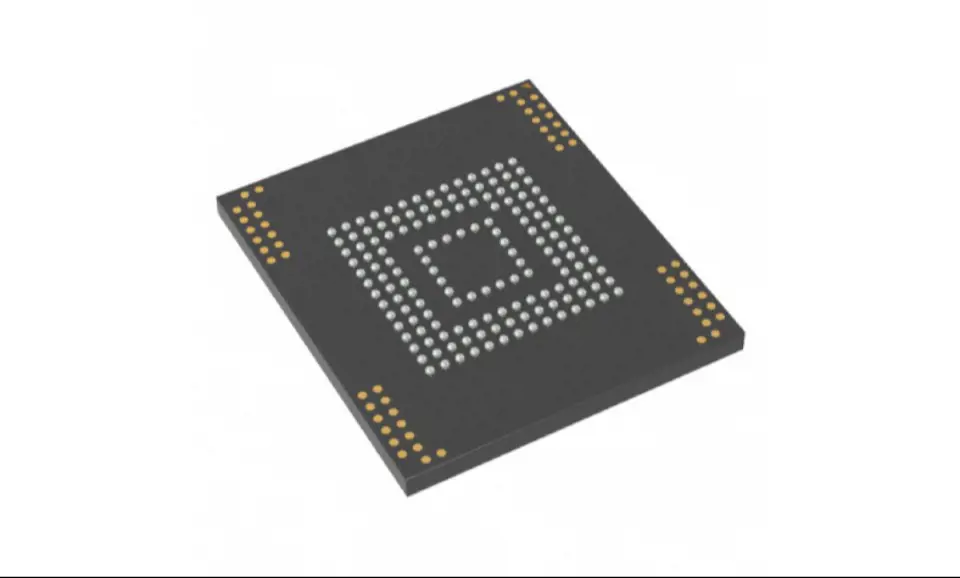
HT12E Package

HT12E vs. HT12D
| Feature | HT12E (RF Encoder) | HT12D (RF Decoder) |
|---|---|---|
| Package Type | 18-pin DIP | 18-pin DIP |
| Operating Voltage | 2.4V ~ 12V | 2.4V ~ 12V |
| Technology | Low Power, High Noise Immunity, CMOS | Low Power, High Noise Immunity, CMOS |
| Standby Current | 0.1uA (typ.) at VDD=5V | 0.1uA (typ.) at VDD=5V |
| Minimum Transmission Word | 4 | - |
| Built-in Oscillator | Yes, requires only 5% Resistor | Yes, requires only 5% Resistor |
| Data Code Polarity | Positive | - |
| Address/Data Pins | 8 address, 4 data bits (externally programmable) | 8 ~ 12 address, 0 ~ 4 data bits |
| Data Decoding | - | Receives and processes serial address/data |
| Data Checking | - | Checks received data 3 times |
| VT Output | - | Goes high during valid transmission |
| Interface | Easy Interface with RF or Infrared transmission medium | Easy Interface with RF or Infrared transmission medium |
| Protocol | Secure and robust | Secure and robust |
| Applications | Remote control and security | Remote control and security |
| Compatibility | Compatible with HT12D decoder IC | Compatible with HT12E encoder IC |
| External Components | Minimal | Minimal |
Both HT12E and HT12D ICs are designed for remote control system applications. The HT12E encodes 12 bits of information (8 address bits and 4 data bits), and the HT12D decodes the received data. They operate at an operating voltage range of 2.4V to 12V, offer a low standby current, and are ideal for various remote control and security applications.
Conclusion
The HT12E encoder IC plays a crucial role in transmitting 4 bits of encoded data, typically requiring a decoder pair like the HT12D IC. To function properly, both encoder and decoder must be configured with the same 8-bit address data. Despite this requirement, the HT12E encoder IC is highly versatile and reliable, serving as a vital component in numerous wireless communication systems. Its simplicity and user-friendly nature have made it a preferred choice among beginners and experts alike in the field.
Read More

FAQ
-
Why do we use HT12E?
The HT12E can transform input data into a serial output.
-
What is the frequency of HT12E?
433.92 MHz.
-
What is the price of HT12E?
The cost of HT12E can fluctuate based on the supplier, quantity, and region. For the latest pricing details, visit Xecor. Generally, HT12E is an affordable IC suitable for a variety of wireless remote control applications.
-
What is the connection between HT12E and HT12D?
To debug the encoder-decoder IC, follow these steps: connect pin 7 of HT12E to pin 14 of HT12D, connect the button to pins 10, 11, 12, and 13 of HT12E, and connect 4 LEDs to pins 10, 11, and 12 of the decoder, and pin 13 to complete the connections.
-
How do you test HT12E and HT12D?
Begin by verifying the integrity of the input signals to the encoder. Next, examine the signal going to the transmitter module. Assuming the transmitter and receiver modules are functioning correctly (which may require more advanced instrumentation to confirm), proceed to check the signal output from the receiver module

Still, need help? Contact Us: [email protected]